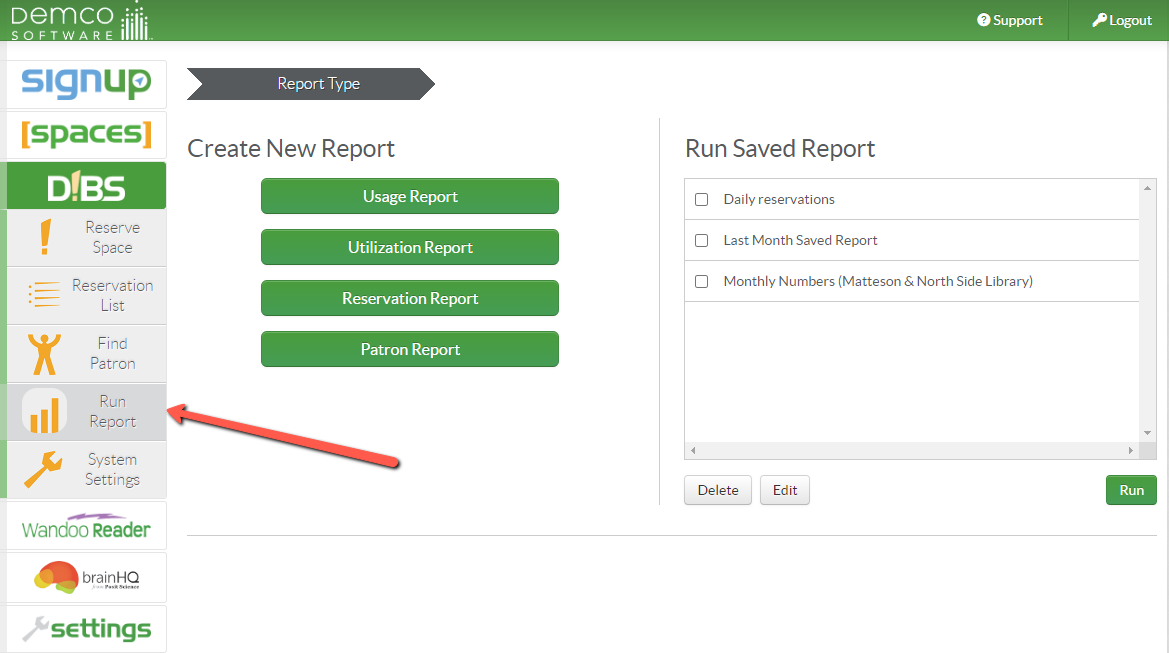
Reports can be accessed from the D!bs Admin Homepage in the side navigation. There are four principle reports in D!bs.
Usage Report
The Usage Report can help you get a feel for how often rooms are being requested.

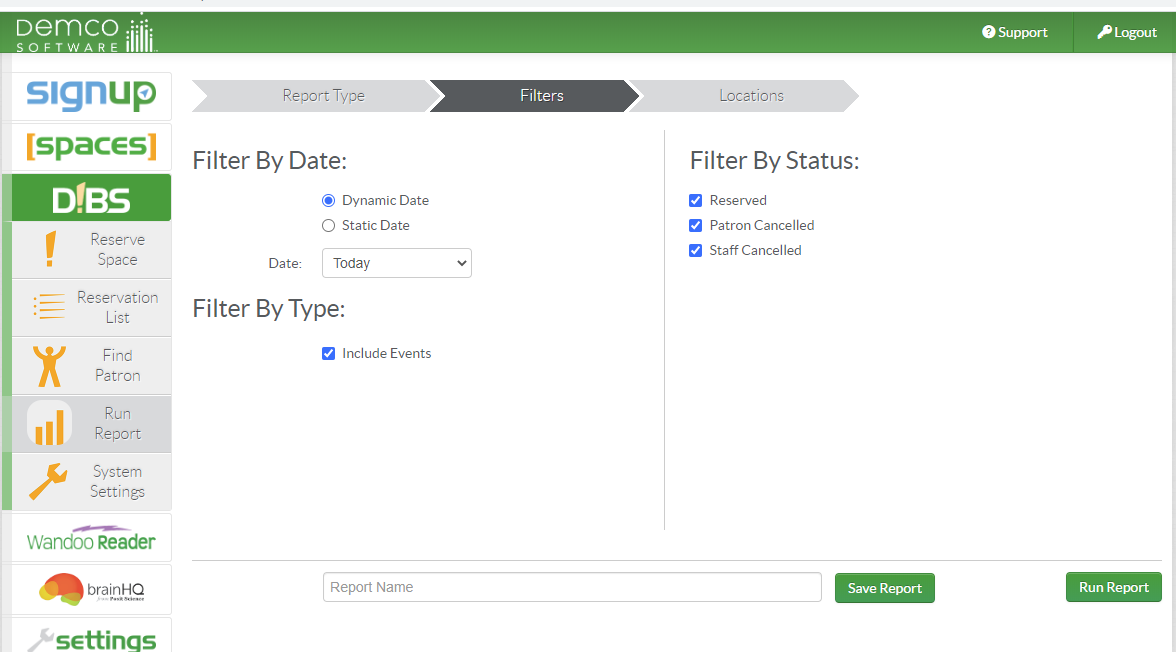
First, select the filters you would like to use.
Filter By Date
Dynamic Date expresses the dates as they relate to today (i.e. Today, Tomorrow, Next Week, etc.)
Static Date expresses the dates in month/day/year format and uses a starting and ending date.
Filter By Status
These filter options allow you to filter the report by reservations status (Reserved, Patron Cancelled, Staff Cancelled)
Filter By Type
Including events in D!BS reports allows you to capture the total view of a room's usage. Please note this filter option only appears if you also have the SignUp product enabled. Specific information related to this integration can be found here:
http://kb.demcosoftware.com/article.php?id=759
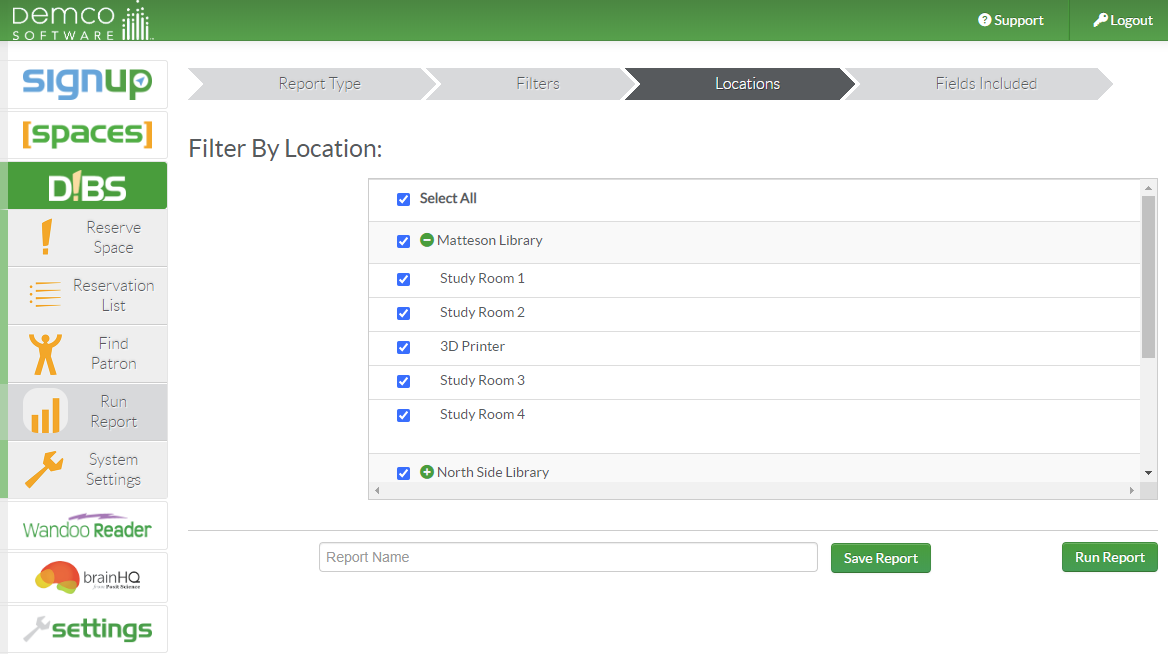
The Locations tab allows to further filter your report by selecting all locations and spaces or by selecting choice locations and spaces. Click the green "+" icon to expand locations to display their respective spaces for including or not including in your report
You can enter a report name toward the bottom of the screen to save your report settings for future use. This will cause the saved report to appear on the main report screen so it can be run with a single click of the mouse.
When you click the Run Report button, a new web page will open with the report results. By clicking on the heading at the top of the column, you can sort by that particular filter.
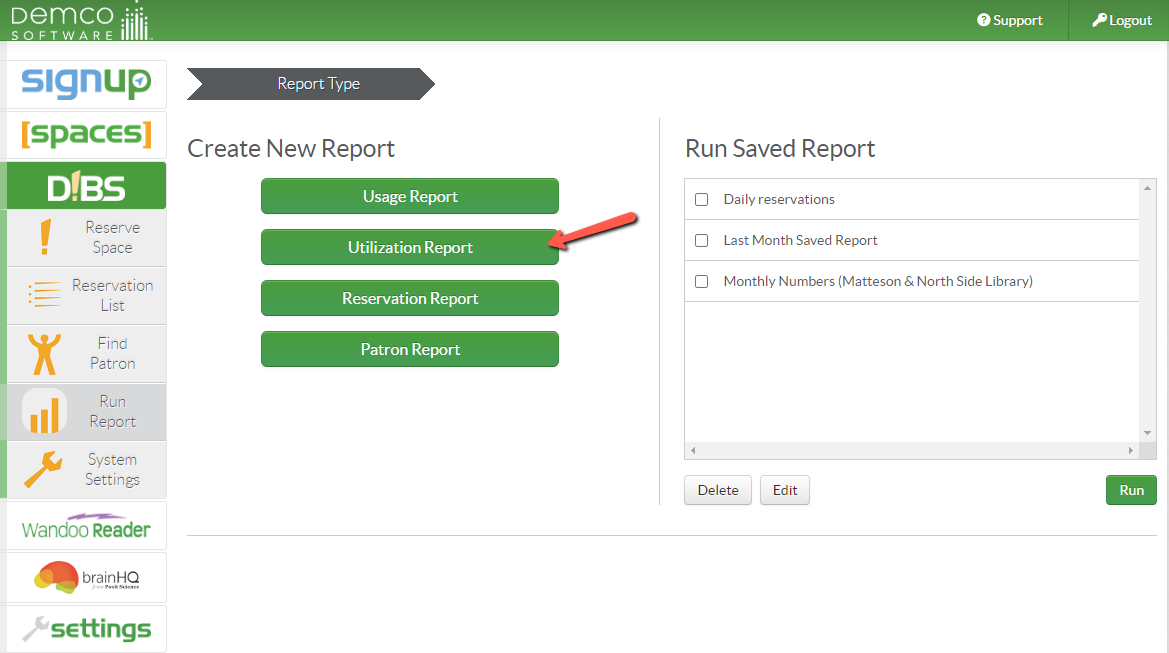
Utilization Report
The Utilization Reports will tell you the total minutes a room was used compared to the total available minutes.
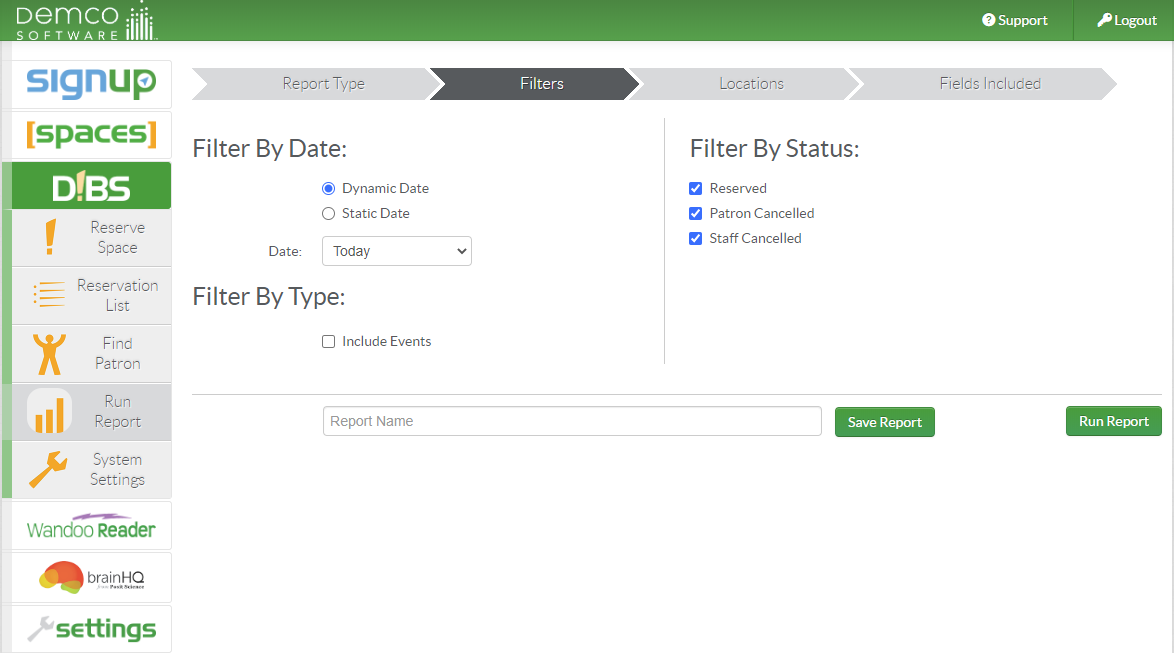
First, select the filters you would like to use.
Filter By Date
Dynamic Date expresses the dates as they relate to today (i.e. Today, Tomorrow, Next Week, etc.)
Static Date expresses the dates in month/day/year format and uses a starting and ending date.
Filter By Status
These filter options allow you to filter the report by reservations status (Reserved, Patron Cancelled, Staff Cancelled)
Filter By Type
Including events in D!BS reports allows you to capture the total view of a room's utilization. Please note this filter option only appears if you also have the SignUp product enabled. Specific information related to this integration can be found here:
http://kb.demcosoftware.com/article.php?id=759
The Locations tab allows to further filter your report by selecting all locations and spaces or by selecting choice locations and spaces. Click the green "+" icon to expand locations to display their respective spaces for including or not including in your report
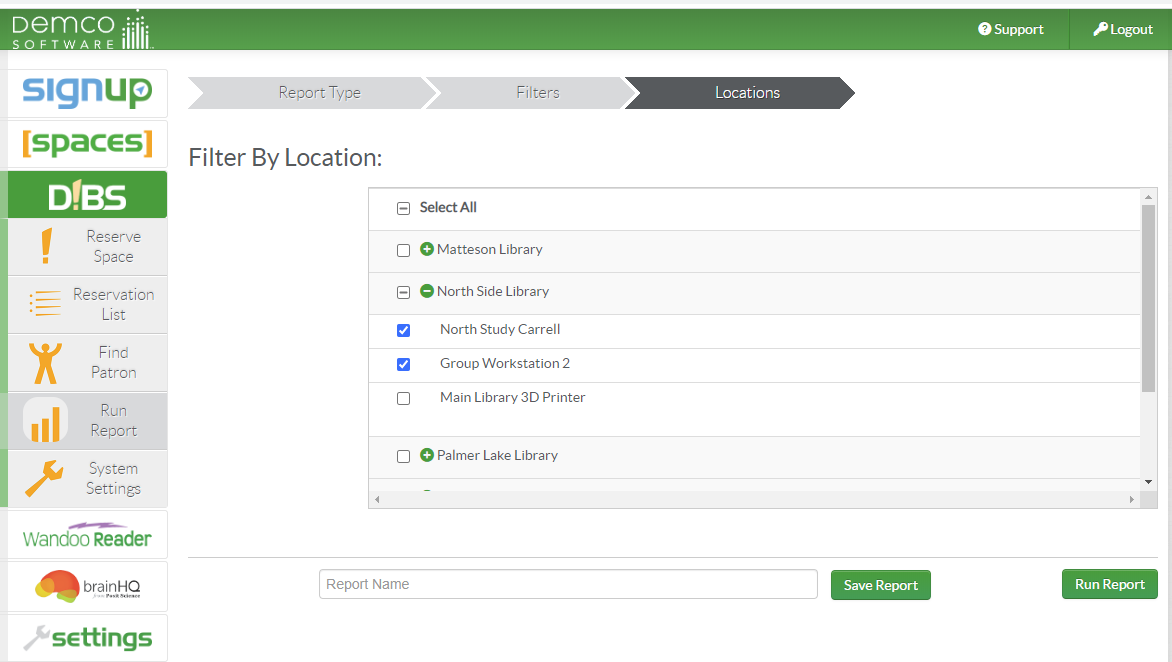
You can enter a report name toward the bottom of the screen to save your report settings for future use. This will cause the saved report to appear on the main report screen so it can be run with a single click of the mouse.
When you click the Run Report button, a new web page will open with the report results. By clicking on the heading at the top of the column, you can sort by that particular filter.
Reservation Report
The Reservation Report will provide data related to who has reserved a room in the D!bs system. This report has additional configurations beyond the Utilization and Usage Reports. There are fields related to reservations that can be included/excluded from your report.

First, select the filters you would like to use.
Filter By Date
Dynamic Date expresses the dates as they relate to today (i.e. Today, Tomorrow, Next Week, etc.)
Static Date expresses the dates in month/day/year format and uses a starting and ending date.
Filter By Status
These filter options allow you to filter the report by reservations status (Reserved, Patron Cancelled, Staff Cancelled)
Filter By Type
Including events in D!BS reports allows you to capture the total view of a room's utilization. Please note this filter option only appears if you also have the SignUp product enabled. Specific information related to this integration can be found here:
http://kb.demcosoftware.com/article.php?id=759
The Locations tab allows to further filter your report by selecting all locations and spaces or by selecting choice locations and spaces. Click the green "+" icon to expand locations to display their respective spaces for including or not including in your report
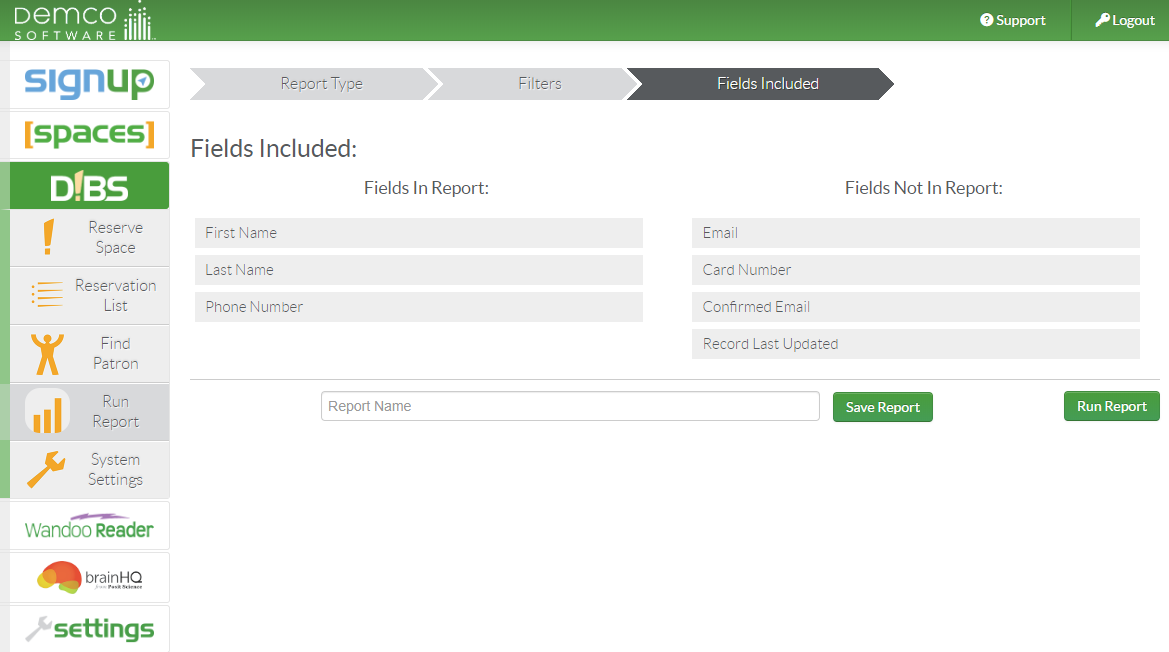
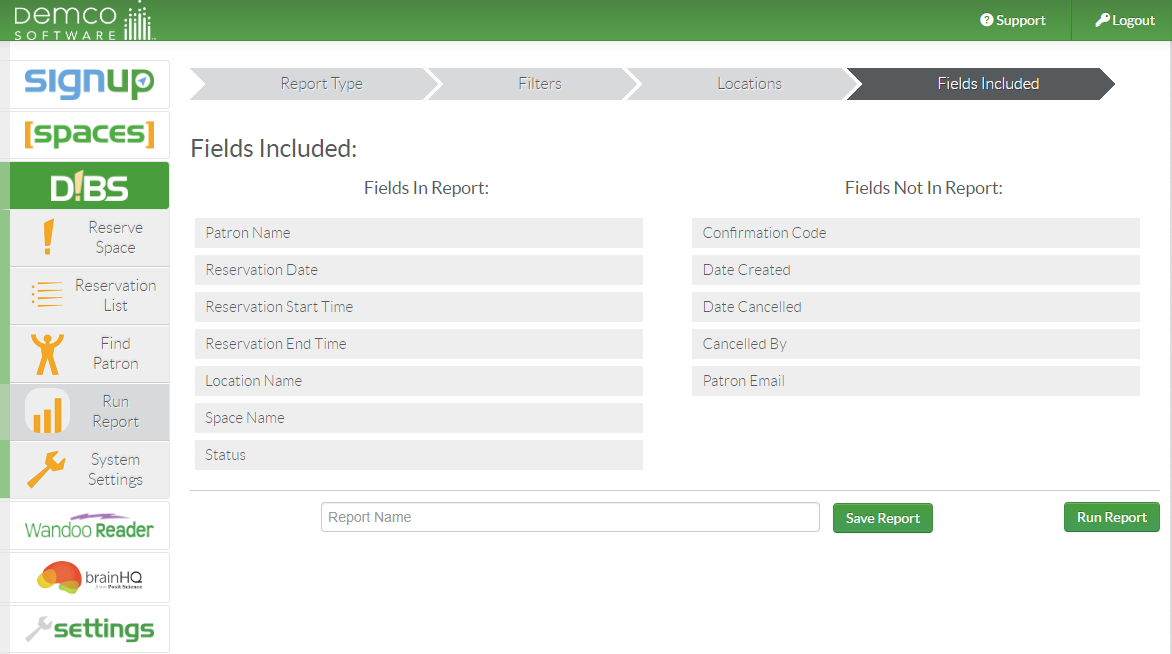
The Fields Included tab allows you to choose which fields you would like included in your report. This gives you the ability to create a report tailored specifically to your needs. The gray field boxes are drag-able. Drag and drop any fields you want in the "Fields In Report" column and drag and drop any fields you do not want in the "Fields Not In Report" column. The order in which you put the "Fields included" will be the order in which they fall in the report.
You can enter a report name toward the bottom of the screen to save your report settings for future use. This will cause the saved report to appear on the main report screen so it can be run with a single click of the mouse.
When you click the Run Report button, a new web page will open with the report results. By clicking on the heading at the top of the column, you can sort by that particular filter.
Patron Report
The Patorn Report will provide data about your patron records in D!bs. This report also has fields that can be included/excluded.

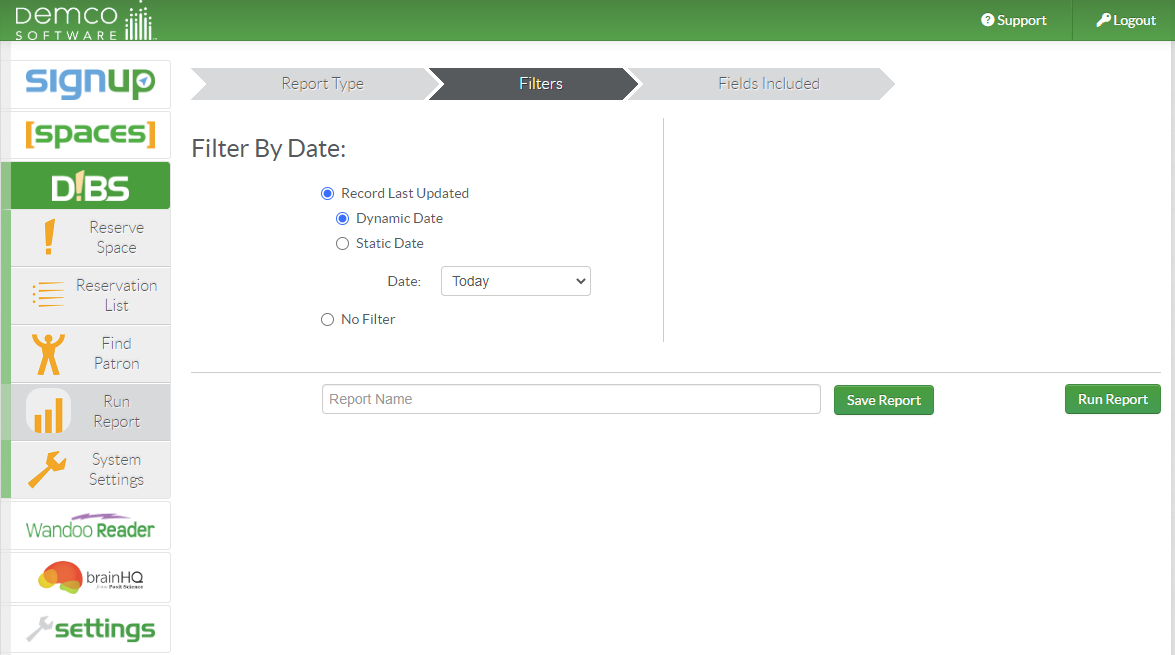
First, select the filters you would like to use.
Filter By Date
- Record Last Updated
- Dynamic Date expresses the dates as they relate to today (i.e. Today, Tomorrow, Next Week, etc.)
- Static Date expresses the dates in month/day/year format and uses a starting and ending date.
The Fields Included tab allows you to choose which fields you would like included in your report. This gives you the ability to create a report tailored specifically to your needs. The gray field boxes are draggable. Drag and drop any fields you want in the "Fields In Report" column and drag and drop any fields you do not want in the "Fields Not In Report" column. The order in which you put the "Fields included" will be the order in which they fall in the report.
You can enter a report name toward the bottom of the screen to save your report settings for future use. This will cause the saved report to appear on the main report screen so it can be run with a single click of the mouse.
When you click the Run Report button, a new web page will open with the report results. By clicking on the heading at the top of the column, you can sort by that particular filter.


;)

;)
;)
;)
;)
;)


 Add Comment