This document demonstrates how to add/edit locations and spaces for SignUp, Spaces, and D!BS.
Click here to view a short video overview of the "Location Setup" area.
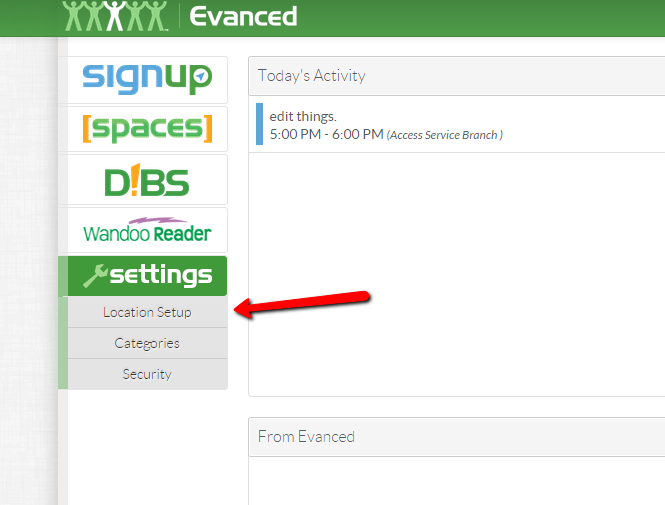
To access the Location Setup area, you need to first be sure you’re logged in at the admin permission level.
Choose the "Settings" button and select the "Location Setup" option from the drop-down menu.
Adding a location
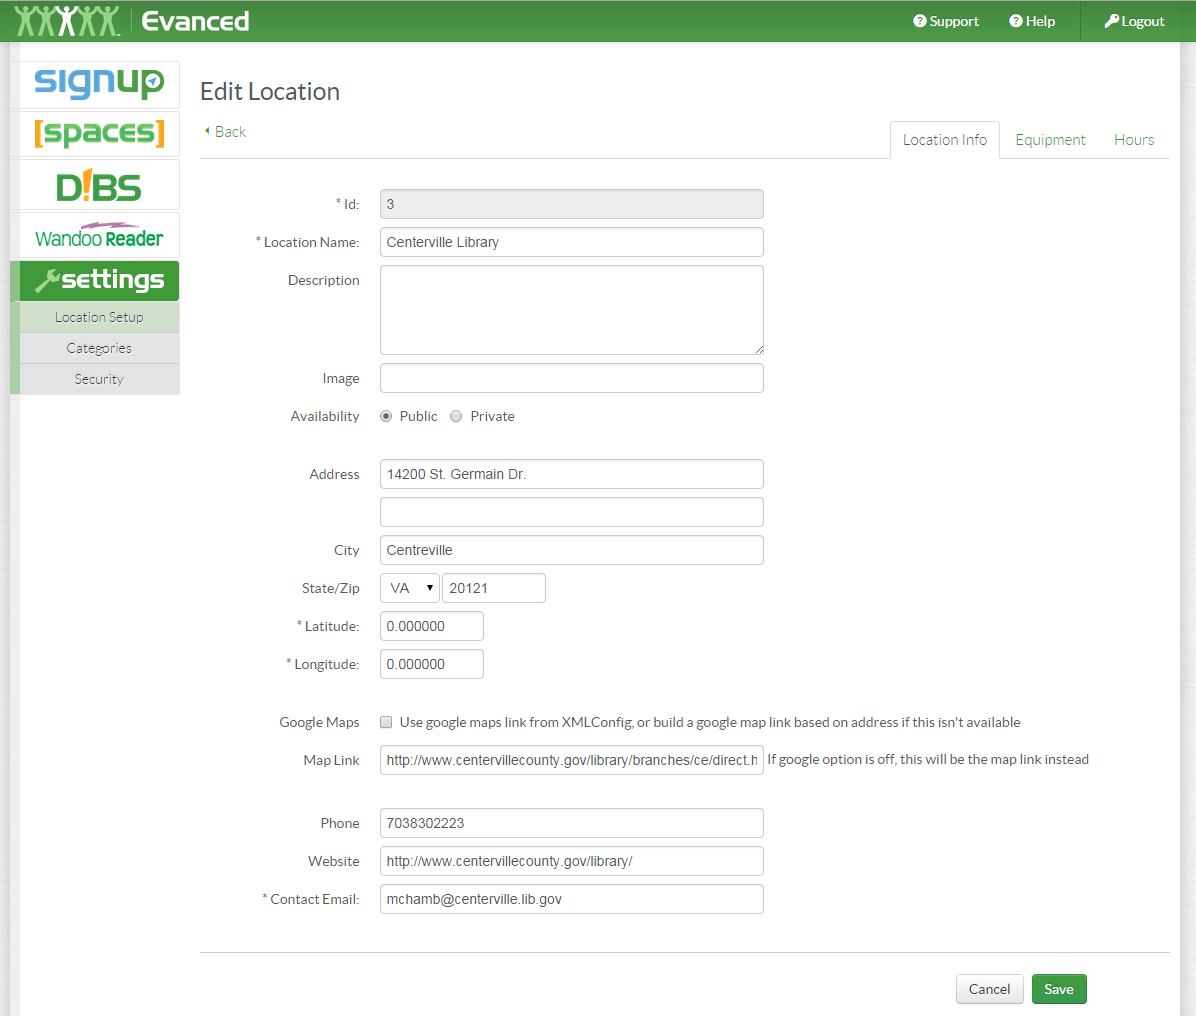
 To add a location (or branch), click on the "Add Location" button from the top-right area of the screen.
After you fill out the location information, select the "Save" button to allow access to the location "Equipment" and "Hours" tabs.
Here are some fields that may need some further explanation:
- Availability: Choosing Private will make this location accessible by staff only (not patrons).
- Latitude/Longitude: Just enter zeros in here if you do not wish to use this feature, or use a program like Google maps to determine your latitude and longitude (mostly used in D!BS).
- Google Maps: You can enter a Google Maps URL that provides a "push pin" visualization of where the location is on a Google Map (mostly used in D!BS).
- Contact Email: This should be an email address of the staff member in charge of your Spaces/SignUp/D!BS system
Adding a Space
You have to have a location created before creating a space in that location
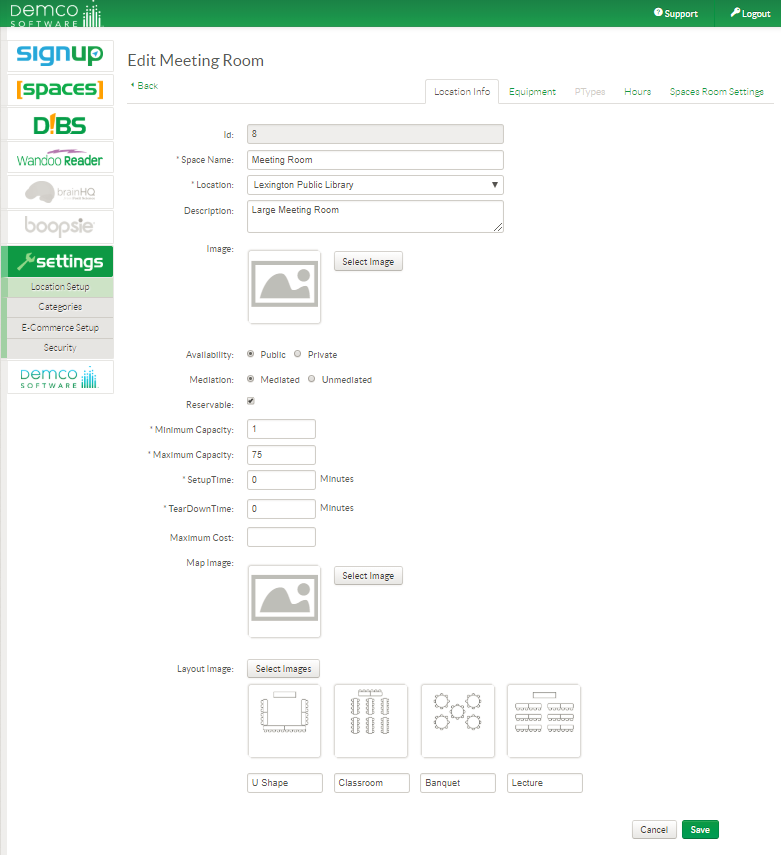
To add a space, click the "Add Space" button
- Image: Input URL path of the image file (click here for recommended image sizes). Check out this blog post for some great suggestions for staging your room for this kind of photo.
 Availability: Public= Reserve by the public & Staff, Private=Reserve only by staff
- Mediation: Mediated=Reserve by Spaces, Unmediated=Reserve by D!BS (for D!BS customers only)
- Reservable: Check this if reservable by Spaces or D!BS, leave blank if you just want this space accessed by SignUp only.
- Minimum Capacity: The minimum sized group needed to qualify to reserve this space (you probably don’t want a group of two people allowed to reserve your 300 seat auditorium). This must be set to 1 or greater.
- Maximum Capacity: The maximum sized group allowed to reserve the space. If changes are made on an unmediated space (D!BS), please let support know.
- SetupTime: Set to Zero if no default setup time is required (for Spaces customers only)
- TearDownTime: Set to Zero if no default teardown time is required (for Spaces customers only)
- Maximum Cost: Used in conjunction with your fee structure. Leave this blank if it does not apply to you. (for SignUp & Spaces customers only)
- Map Image: This is currently only used in D!BS. Input URL of an image map (click here for recommended image sizes). This is typically used to put a simple map diagram of where the room is located in the location (think fire escape map that is typically posted in school rooms with a "You Are Here" arrow).
- Layout Image: This is currently only used in Spaces. You have the ability to allow patrons to select one of these layouts when reserving a space in Spaces (click here for recommended images).
Editing a Location or Space
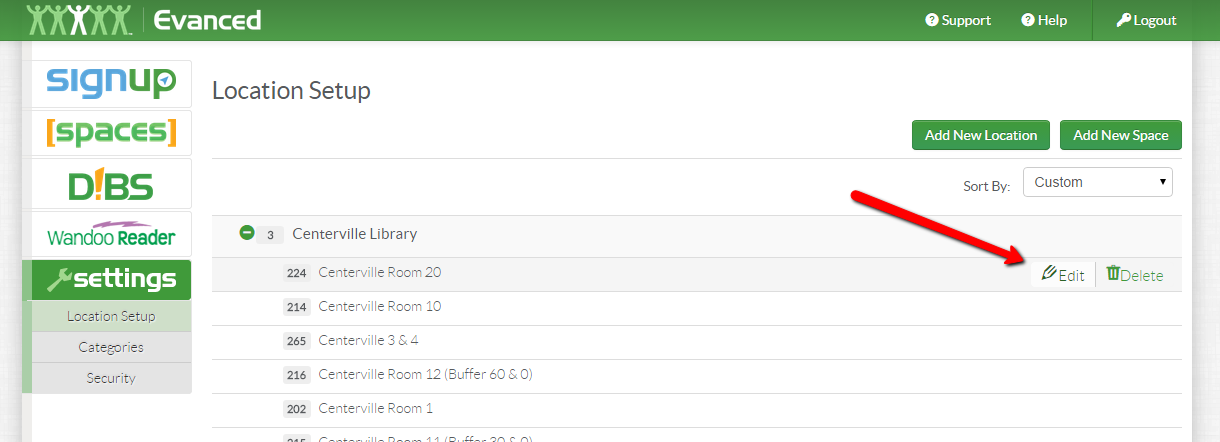
To edit or delete a Location or Space, after it has been created, mouse-over the area to the right of the location or space name, and click on the "Pencil Icon". Be sure to click on the "Save" button after making any changes.
Changing the Display Order for a Location or Space
 Once you have your locations and spaces input into your system, you can change the order in which they appear in lists to your patron and staff. For example, you may want to change the order of how your rooms appear to your patrons based off of the most-used rooms, rather than by the default alphabetical order.
- First choose "Custom", from the "Sort By" drop down list on the top-right area of the Location Setup list page.
- Now, drag and drop the Locations and/or spaces in the order you want.
- Below is pictured an example of how a customized list, now appears to your patrons or staff.


 Add Comment